by Oliver
8. September 2017 00:04
To set up API access to a site's Search Console, we first need to set up and configure a project in the Google Developer Console. Afterwards, we will connect that project to the Search Console to retrieve data from there using our own application.
In the Google Developer Console
- Set up a project in your Google Developer Console (or reuse an existing project).
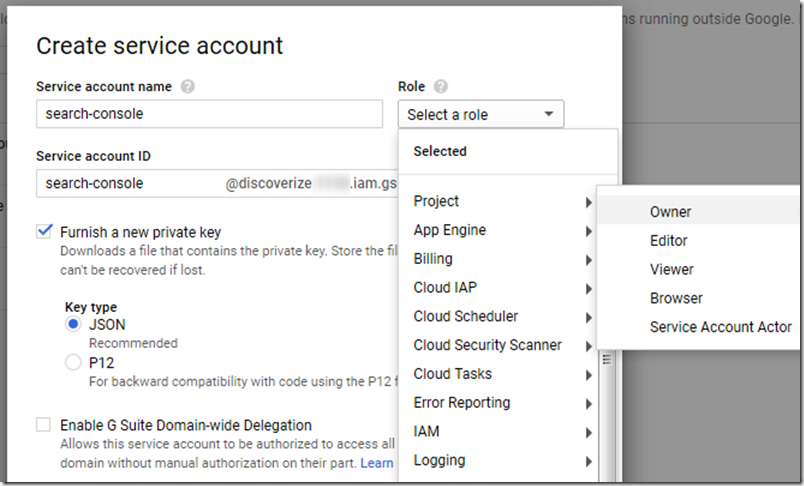
- Go to the Service Accounts page and click [+] CREATE SERVICE ACCOUNT:

Check "Furnish a new private key" to retrieve a JSON file with credentials that can be used from your application to impersonate that account. - Save the file that is being offered as a download. Its name has the form <ProjectId>-<Hash>.json, e.g. discoverize-b134aef29b12.json. This file is confedential – anyone with access to it can do what your Service Account is allowed to! So treat it respectively.
- Go to the project dashboard and click [+] ENABLE APIS AND SERVICES:

- Click on the Google Search Console API link and on the next page click ENABLE.
That's what had to be done in the Google Developer Console.
Now we'll turn to the Google Search Console aka Webmaster Tools.
In the Google Search Console
- Make sure you have a property set up in the Search Console for the target site. Let's assume you're targeting https://glamping.info. The protocol is of importance: http://glamping.info and https://glamping.info will be two different properties.
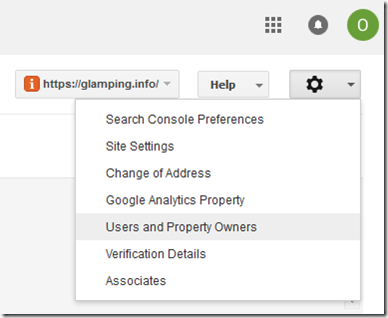
- In the settings drop-down menu, go to Users and Property Owners:

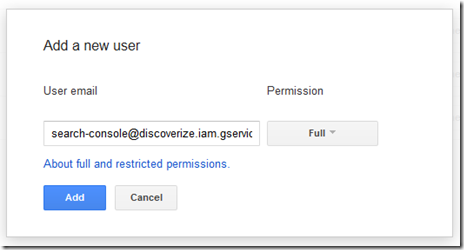
- Click ADD A NEW USER (do not Manage Property Owners):

Add the email address of the Service Account you've created in Google Developer Console and give it Full permission.
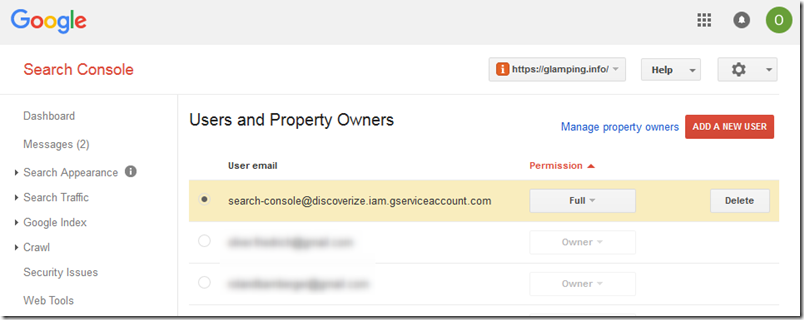
Note: do NOT add the Service Account as a Property Owner before adding it as a user, otherwise API access using it will NOT work. This is a bug – see this stackoverflow answer for more details. - When you click Add, you'll see the new user on the Users and Property Owners page:

Now, you're all set up to access your site's Search Console using the Google API.
Happy coding!